How to Choose PU Sandwich Panels for Your Project?

Choosing PU sandwich panels is not a catalog exercise. It is a building-performance decision shaped by climate, occupancy, fire requirements, and installation quality. A cold-storage wall may need a different core density, joint design, and vapor-control strategy than a warehouse roof.

Experienced contractors know that small details become expensive problems. A crushed panel edge can break the airtight seal. A misaligned cam-lock joint can create a cold stripe across the wall. Moisture may then collect behind the facing, where damage remains invisible for months. These risks deserve attention before comparing prices.

Building-science expert Joseph Lstiburek often says, “You have to get the water out.” His warning applies directly to PU sandwich panels. Water management, drainage, and sealed penetrations should be assessed alongside thermal conductivity and U-values. Fire classification, facer material, panel thickness, span capacity, and local code documentation also require verification.

A reliable selection process begins with the project conditions. Record indoor temperature, humidity, wind exposure, cleaning methods, and expected service loads. Ask manufacturers for tested performance data, installation manuals, warranty terms, and evidence from comparable projects. Do not trust a promising datasheet alone.

Some choices remain imperfect. A thicker panel may improve insulation but reduce usable space. A cheaper facing may satisfy the budget but resist impacts poorly. Even experienced teams can overlook fastener spacing or thermal bridges. That is why mock-up installation and independent inspection are valuable.

This guide explains how to compare PU sandwich panels with practical judgment, not marketing language. The right panel is the one that performs consistently after installation, maintenance, and years of changing site conditions.

How to Choose PU Sandwich Panels for Your Project?

What Are PU Sandwich Panels and How Do They Work?

PU sandwich panels combine two rigid outer skins with a polyurethane foam core. The skins may use coated steel or another approved facing material. The core contains closed cells that reduce heat transfer through walls and roofs. This structure adds stiffness without making the panel excessively heavy. In simple terms, the skins provide strength, while the foam improves thermal insulation. The joints matter too. Poorly aligned edges can create cold bridges, air leaks, and condensation.

For project selection, check the required U-value, fire classification, moisture exposure, span, and fixing method. A cold-storage room needs tighter joints than a dry warehouse. Panel thickness should follow the design calculation, not a convenient catalogue size. During installation, workers should protect cut edges and seal penetrations around doors, lights, and services. I have seen a small unsealed opening cause visible frost near a freezer doorway. That detail looked minor. It was not.

Reliable specifications should state core density, dimensional tolerances, facing thickness, test standards, and service temperature. Ask for current test reports and installation guidance. Do not judge performance from foam thickness alone. A thicker panel can still perform poorly when joints, fasteners, or drainage are mismanaged. PU is not automatically suitable for every fire strategy. The final choice should meet local codes and the building’s actual use. I sometimes overfocus on thermal efficiency. Real projects also demand maintainability, repair access, and careful workmanship.

Which Project Requirements Should Guide Your Panel Selection?

How to Choose PU Sandwich Panels for Your Project?

Which Project Requirements Should Guide Your Panel Selection?

Panel selection should begin with the building’s actual conditions, not a preferred thickness. The 2023 UNEP Global Status Report states that buildings consume about 30% of global final energy. Therefore, insulation performance deserves careful attention. Review the panel’s declared U-value, core density, joint design, and installation tolerances. A low U-value on paper may disappoint if joints leak air or thermal bridges remain around doors and fixings. Thickness alone misleads.

Fire performance must match the project’s risk profile and local code. Ask for independent test evidence, reaction-to-fire classification, and complete assembly results under EN 13501-1 or the applicable standard. Moisture exposure matters too. Cold rooms, coastal warehouses, and food facilities require suitable facings, sealed joints, and corrosion resistance. Structural checks should include wind suction, span, snow load, hanging equipment, and temperature movement. A neat specification can still fail on site.

Tips: Prepare a requirement sheet before requesting quotations. Record internal temperature, humidity, span, panel length, fire classification, cleaning chemicals, and expected service life. Compare tested assemblies, not isolated material claims. During installation, inspect every joint and penetration with photographs. I once underestimated this step; a small unsealed corner created condensation and costly rework. Also question unusually low prices. They may reflect thinner coatings, weaker joints, or incomplete testing rather than genuine efficiency.

How to Compare PU Panel Core, Thickness, and Thermal Performance?

How to Choose PU Sandwich Panels for Your Project?

Comparing the core, thickness, and thermal performance requires more than reading a product sheet. A polyurethane core can provide strong insulation because its closed-cell structure slows heat transfer. Check the declared thermal conductivity, not only the advertised R-value. Lower conductivity usually means better insulation, but test conditions matter. Ask whether values were measured at a realistic mean temperature. Small details matter.

Thickness should match the building’s climate, use, and heating load. A 50 mm panel may suit an internal partition, yet perform poorly on a cold storage wall. For a refrigerated room, review the target U-value, door openings, joint design, and floor insulation together. Thicker panels are not automatically better. Poorly sealed joints can create thermal bridges and condensation, even with a thick core. Inspect the tongue-and-groove connection, sealant compatibility, and fastener placement. Moisture changes performance.

In practical comparisons, request independent test reports and installation guidance. Confirm fire classification and local code requirements before ordering. Core density also deserves attention, especially where panels face impact, lifting, or frequent washing. Higher density may improve strength, but it can raise cost without solving every thermal problem. Do not compare figures from different test methods as if they were equal. That shortcut often misleads.

How Do Surface Materials and Panel Dimensions Affect Your Choice?

Choosing a PU sandwich panel starts with its surface material, not only its insulation core. I have seen a suitable panel perform poorly because its facing was selected too quickly. Steel facings suit many walls and roofs, especially when coated against moisture and corrosion. Aluminum can reduce weight, but it may dent more easily during handling. In clean rooms, smooth coated surfaces simplify washing and reduce dirt traps. That detail matters.

Think about the site conditions.

A coastal building needs stronger corrosion protection than a dry warehouse. A food facility may require approved hygienic finishes and carefully sealed joints. Surface color also affects heat gain, although its effect depends on climate, insulation thickness, and ventilation. Do not judge performance from appearance alone. Ask for coating data, fire classification, thermal conductivity, and test conditions. Documents can expose weak assumptions.

Panel dimensions change installation speed and structural behavior. Thicker panels usually improve thermal resistance, but they add weight and may need stronger support. Long panels reduce horizontal joints, yet they can be difficult to transport through narrow entrances. Standard widths may lower waste, while custom sizes can improve fit around doors and equipment.

Measure the actual frame, not the drawing only. I learned that lesson after a small site mismatch created extra cutting and visible seams. Joint design deserves equal attention. A tight connection can limit air leakage, but poor installation can defeat a high-quality panel. Check span tables, tolerances, lifting methods, and local building requirements before ordering. The “perfect” dimension may still be impractical.

What Installation, Safety, and Cost Factors Should You Evaluate?

Choosing PU sandwich panels starts with the installation environment, not the catalogue price. Measure wall spans, roof loads, temperature changes, and delivery access before ordering. Measure twice. A panel may meet the specification but still fail on site if cranes cannot reach the unloading area. Check core thickness, joint design, surface finish, and expected insulation performance. Request tested thermal and fire data, rather than vague marketing claims. Local building requirements should guide fire classification, fastening, and panel use.

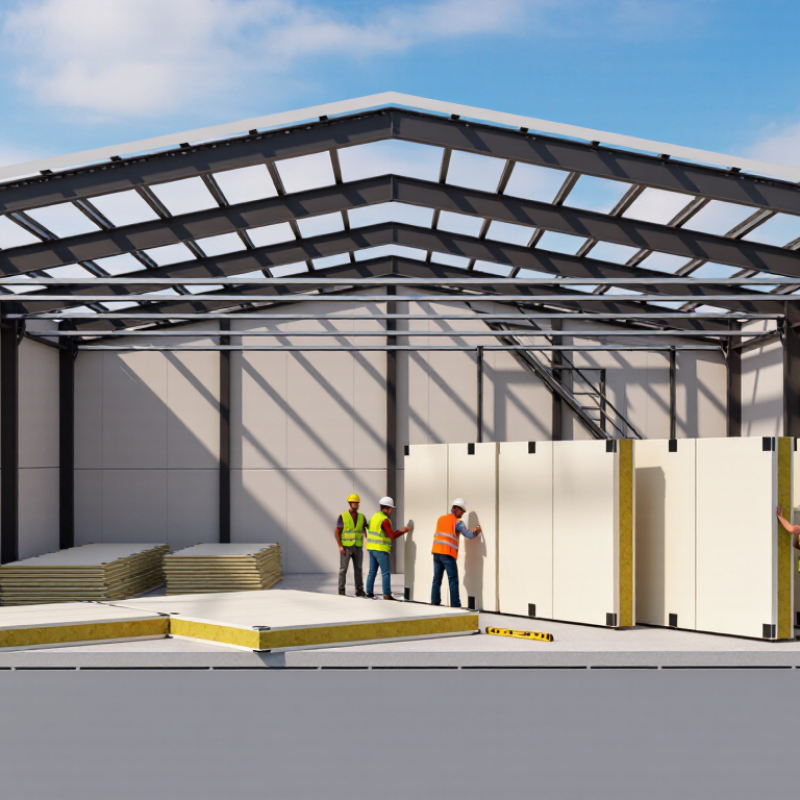
Installation quality directly affects safety and energy performance. Use trained installers, suitable lifting equipment, gloves, eye protection, and stable temporary supports. Keep panels dry and flat during storage. Moisture and crushed edges can damage the joints. Align the first panel carefully, because a small error can spread across an entire wall. Seal penetrations around doors, pipes, and cables with compatible materials. Never improvise around fire-rated assemblies. Small details matter. I have seen rushed cuts create cold bridges and leaking joints. The repair cost exceeded the original labor cost.

Evaluate total cost, including transport, accessories, labor, waste, maintenance, and future energy use. A thinner panel may reduce the purchase price but increase heating or cooling demand. However, thicker is not always better. It can complicate detailing and increase structural loads. Compare quotes using the same thickness, fire performance, coating, and warranty terms. Leave a realistic allowance for damaged panels and weather delays. My review habit is to price one practical option and one safer option, then challenge both. The cheapest estimate often ignores flashings, sealants, and trimming.

How to Choose PU Sandwich Panels for Your Project? - What Installation, Safety, and Cost Factors Should You Evaluate?

Evaluation Factor What to Check Typical Project Data or Range Effect on Safety, Installation, or Cost Practical Selection Guidance
Thermal Insulation Panel core thickness, declared thermal conductivity, joints, and thermal bridging at fixings. PU core thermal conductivity is commonly about 0.022–0.028 W/m·K. Typical thicknesses range from 40–150 mm. Thicker panels generally reduce heat transfer and operating costs but increase material and handling costs. Select thickness according to the required indoor temperature, local climate, building use, and applicable energy code rather than choosing by price alone.
Fire Performance Reaction-to-fire classification, fire-resistance rating of the complete wall or roof assembly, joint design, and test documentation. Fire performance varies significantly by facing material, core formulation, thickness, joints, and installation details. Ratings must be confirmed for the complete assembly. High impact: inadequate fire performance can create serious life-safety, approval, insurance, and replacement risks. Request current third-party test reports and select panels that meet the project’s required fire classification and compartmentation strategy.
Moisture and Vapor Control Panel joint seals, vapor-barrier continuity, condensation risk, water drainage, and compatibility with the interior environment. Cold rooms, food-processing areas, and humid spaces usually require carefully sealed joints and hygienic, washable surfaces. Poor detailing can cause condensation, corrosion, mold growth, insulation loss, and premature panel replacement. Use compatible gaskets or sealants, maintain continuous vapor control, and detail penetrations before installation begins.
Structural and Wind Loads Panel span, support spacing, wind pressure or suction, snow load for roofs, fastener capacity, and deflection limits. Allowable spans vary by panel thickness, profile, facing steel thickness, support conditions, and design load. Do not rely on a generic span value. High impact: undersized panels or fasteners may lead to excessive deflection, leakage, or structural failure. Use project-specific load calculations and manufacturer-tested span tables. Verify both positive and negative wind pressure.
Facing Material and Coating Steel thickness, corrosion protection, coating type, surface finish, chemical exposure, and cleaning requirements. Common steel facings are approximately 0.40–0.80 mm thick. More aggressive environments may require enhanced corrosion protection. Higher-grade facings can increase initial cost but improve durability in humid, coastal, chemical, or wash-down environments. Match the coating and facing thickness to exposure conditions. Avoid selecting a finish based only on appearance or lowest purchase price.
Panel Dimensions and Joint Design Panel length, width, joint profile, tongue-and-groove fit, cam locks if applicable, tolerances, and corner details. Longer panels reduce the number of horizontal joints but may require additional lifting equipment and careful transport planning. Fewer joints can reduce leakage and installation labor; oversized panels may increase handling damage and site risk. Optimize panel sizes for transport routes, lifting capacity, building geometry, and the number of penetrations or openings.
Installation Labor Crew skill, installation sequence, cutting method, lifting equipment, access conditions, and weather limitations. Installation productivity depends on panel size, site access, detailing complexity, and the number of openings. Labor rates vary by region and project conditions. Poor planning increases installation time, offcuts, sealant use, damage, and rework costs. Prepare shop drawings, panel schedules, lifting plans, and a joint-sealing procedure before materials arrive on site.
Worker Safety Manual handling weight, sharp edges, work-at-height controls, temporary bracing, lifting points, and personal protective equipment. Panels should be handled by a suitably sized crew or mechanical equipment according to panel length and weight. Roof work requires fall protection. High impact: uncontrolled lifting, unstable panels, and unprotected roof edges can cause severe injuries. Use a site-specific risk assessment, exclusion zones, edge protection, fall-arrest systems where required, gloves, eye protection, and safe lifting procedures.
Fasteners and Accessories Fastener type, length, corrosion resistance, washer size, spacing, flashings, trims, closures, and sealants. Fastener selection depends on substrate, panel thickness, design loads, and environmental exposure. Accessories can represent a significant portion of installed cost. Incorrect fasteners or missing closures can cause pull-out, corrosion, water ingress, and loss of air tightness. Specify a complete compatible system, including fasteners and flashings. Do not mix accessories without checking chemical and dimensional compatibility.
Air Tightness and Energy Use Joint compression, seal continuity, door interfaces, service penetrations, and roof-to-wall transitions. Air leakage is often controlled more by workmanship and detailing than by the nominal insulation value of the panel. Leaks increase heating or cooling demand and may cause condensation at cold surfaces. Include an installation inspection checklist and, where appropriate, conduct visual checks or air-leakage testing before closing concealed areas.
Hygiene and Cleanability Surface smoothness, joint profile, resistance to detergents, impact resistance, and compatibility with sanitation procedures. Food, pharmaceutical, and medical areas generally require sealed, non-porous, easy-to-clean surfaces and carefully finished corners. Unsuitable surfaces can increase maintenance costs and create contamination-control difficulties. Choose finishes and joint details that tolerate the planned cleaning chemicals, temperature, pressure, and frequency of wash-down.
Life-Cycle Cost Purchase price, accessories, installation labor, energy use, maintenance, repairability, service life, and disposal. The lowest panel price may not be the lowest installed cost because labor, trims, fasteners, access equipment, and sealing materials can materially affect the total. A higher-performing system may reduce energy, maintenance, and replacement costs over the building’s service life. Compare at least three scenarios using total installed cost and expected operating performance, not panel price alone.
Lead Time and Availability Production schedule, standard versus custom dimensions, accessory availability, delivery sequence, and storage requirements. Custom colors, unusual lengths, special coatings, and non-standard thicknesses may require longer procurement periods. Late delivery can delay the building enclosure and increase labor, storage, and temporary-weather-protection costs. Approve shop drawings early, confirm all accessories at the same time, and coordinate deliveries with the installation sequence.
Quality Control and Documentation Product data sheets, installation instructions, batch records, test reports, tolerances, delivery inspection, and warranty conditions. Documentation should identify core type, thickness, facing specification, fire data, thermal data, and applicable standards or test methods. Complete records simplify approvals, inspections, maintenance, and future repairs. Inspect panels for dents, wet packaging, damaged edges, coating defects, and dimensional problems before installation and record nonconformities.

Note: Performance values and installation requirements vary by panel construction, local regulations, design loads, climate, and building use. Confirm final selections with a qualified designer, the applicable building code, and project-specific test documentation.

Leading and shaping the future of endodontics globally is our life’s work.